Startline Guide (GER & AUT)
Startline Guide
Short Explenation for Chronotrack Startlines and Splitlines.
This short guide will walk you through the basics and best practices of setting up the Startline for the Wings for Life Worldrun using ChronoTrack equipment in Germany and Austria.
An important part of Chronotrack Controller Setup is the Antenna Channel Settings.
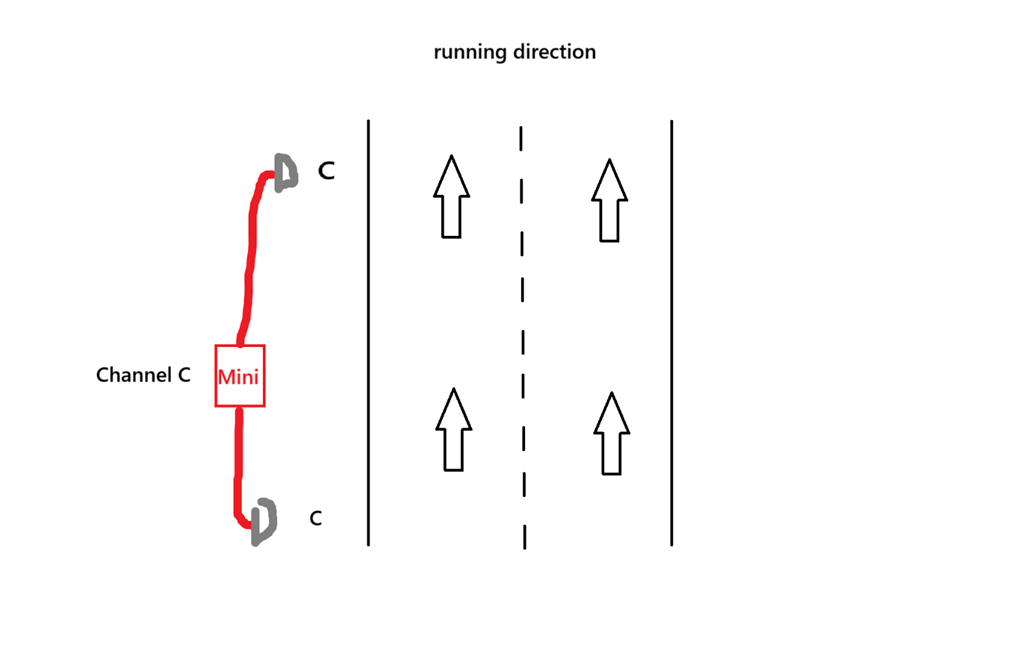
To get the highest read-rate possible the Chronotrack Controller uses CHANNELS to prevent cross-reads, when lines placed next to each other or we have long/complex lines.
Every controller has channel A-B-C-D. One Reader can only have one channel.
A Pro2 has two reader and a Minitrack has one reader.
The best possible line configuration is when the channels next to each other are as much separated as possible.
For example if there are two Minitracks next to each other in one Minitrack will have the Channel A, next one should have D, because these channels are as much seperate as they can be.
This is only important in areas aprox. 20m to other Chronotrack antennas.
Here is how to setup a Startline for the Wings for Life World Run.
1. Lay out and interlock ChronoTrack gators
Lay out and interlock ChronoTrack gators so that the hinge is facing the direction the runners will be approaching/run from.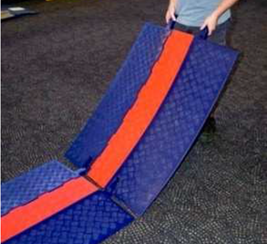
2. Lay out and interlock ChronoTrack gators
Open gator lids and place the antennas inside the gators: For the B-Tags we’re using, the star on the Impinj logo should be facing the hinge side (direction the runners are approaching from).
3. Connect the cables to the antennas
Connect the cables to the antennas and run the cables through gator trough closest to the hinge to the controller. When you turn the cable connectors, you should feel a click as the connectors lock.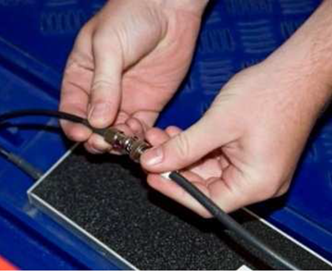
4. Close Lids
Confirm that no cables are jumping troughs inside the gator and close the gator lids. Place the Long ethernet cable in the gators as well, both Pro2 Controller will be connected to each other.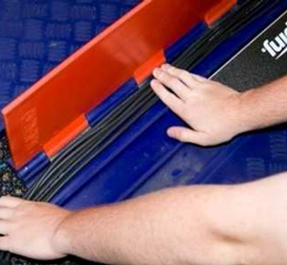
5. Connect everything to the Chronotrack Controller
Connect the the antenna cables to the ChronoTrack Controller by matching the color on the cable to the port color on the controller. Don’t forget to plug in the ethernet cable in the RJ45 Port of the Pro2 Controller.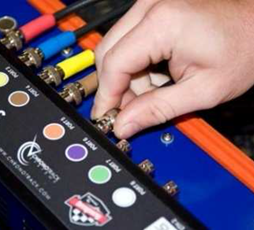
6. Plug in AC Power
If AC power is available, plug the primary power cable into the power brick on the right hand side of the controller, and plug the cable into the outlet.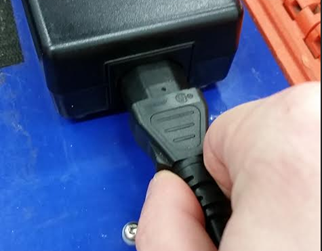
7. Check antennas
Use the provided RFID Detector Card to check the antennas on your lines. The Blue/Green LED on the detector will flash when it picks up an RF signal. Hold the detectors a few cm from each gator/flashpoint and confirm each antenna is emitting a signal.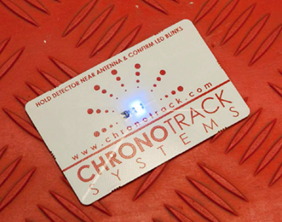
8. Raincover
If there is any chance of rain, cover the controller in the provided rain cover.
If you can’t find it use the open end of a trash bag.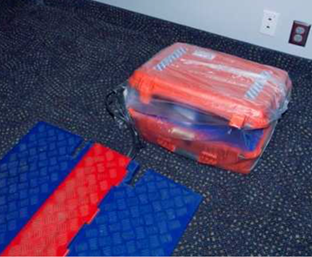
Be very careful to ensure that the Gator hinges are toward the direction from which the athletes will be coming/will run. This is to prevent injuries due to tripping over the antenna channel flaps.
Channel Configuration:
Minitrack:
Pro2:
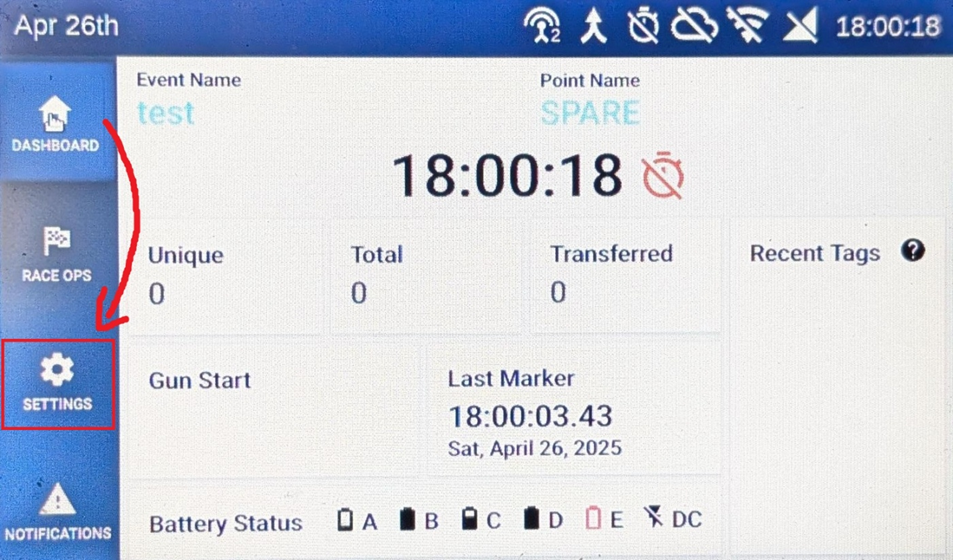
- Looking at the HomeScreen Press “Settings”
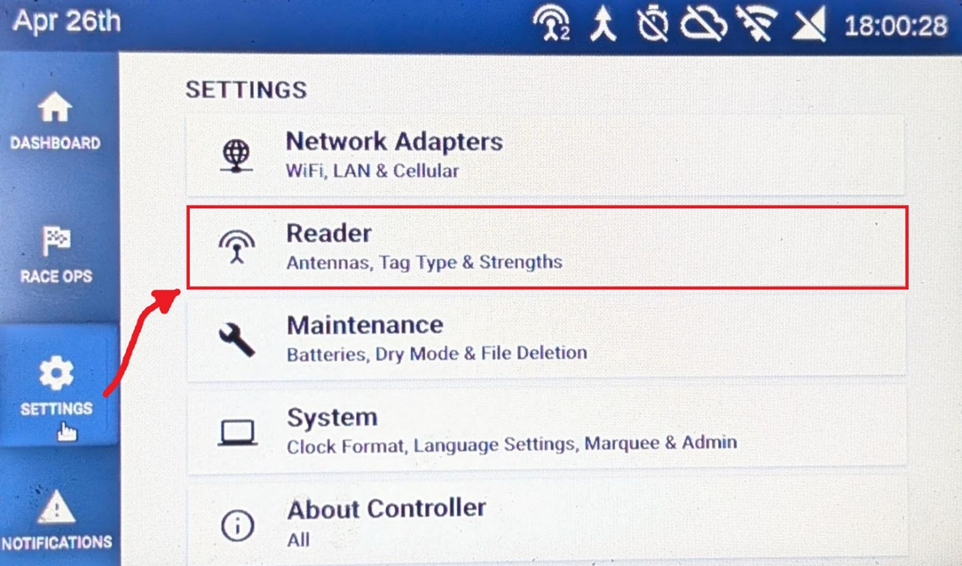
- Press "Reader"
- There you can see what Channel the Readers have. Press “Set” to change them
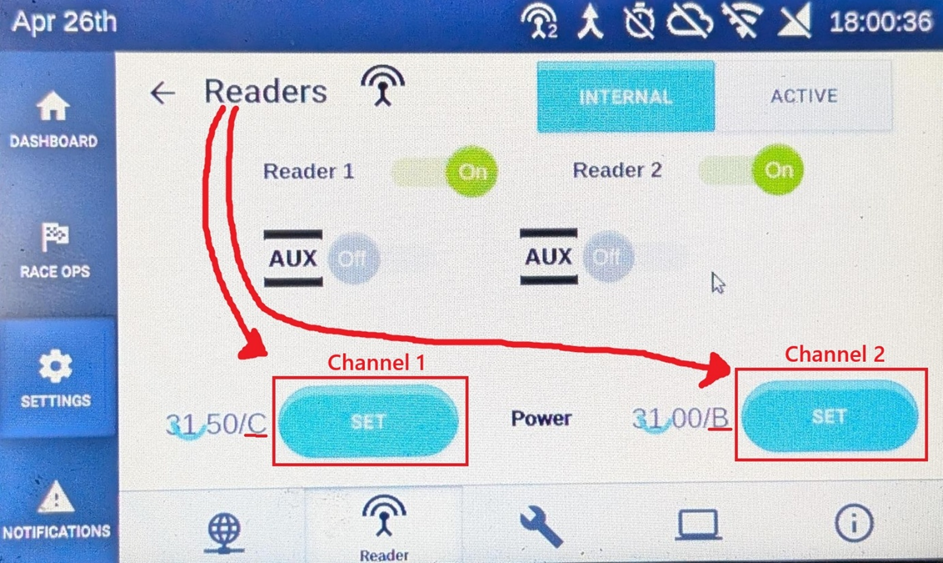
- Don’t change the number on the left side of the screen.
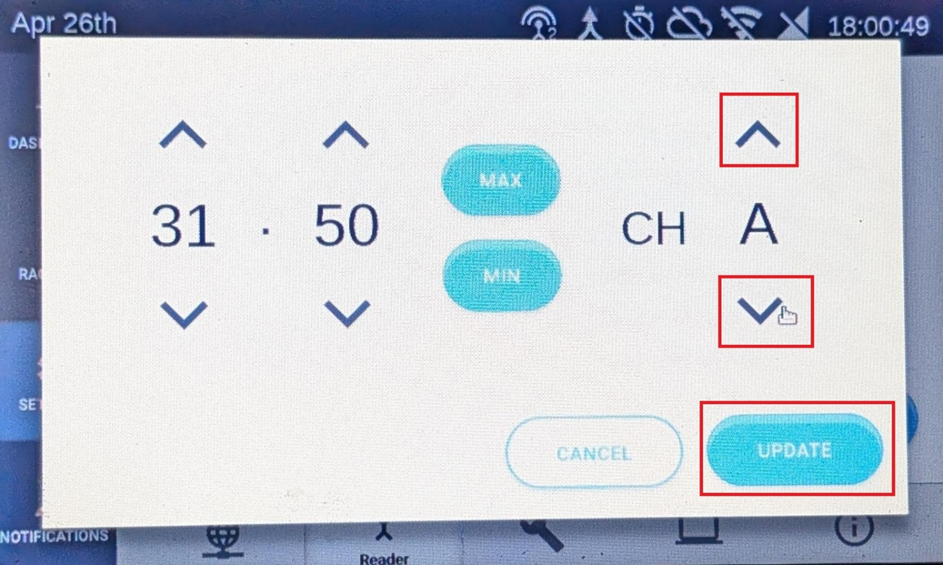
Now you can change the Channel on the right side of the screen via the arrow down and up.
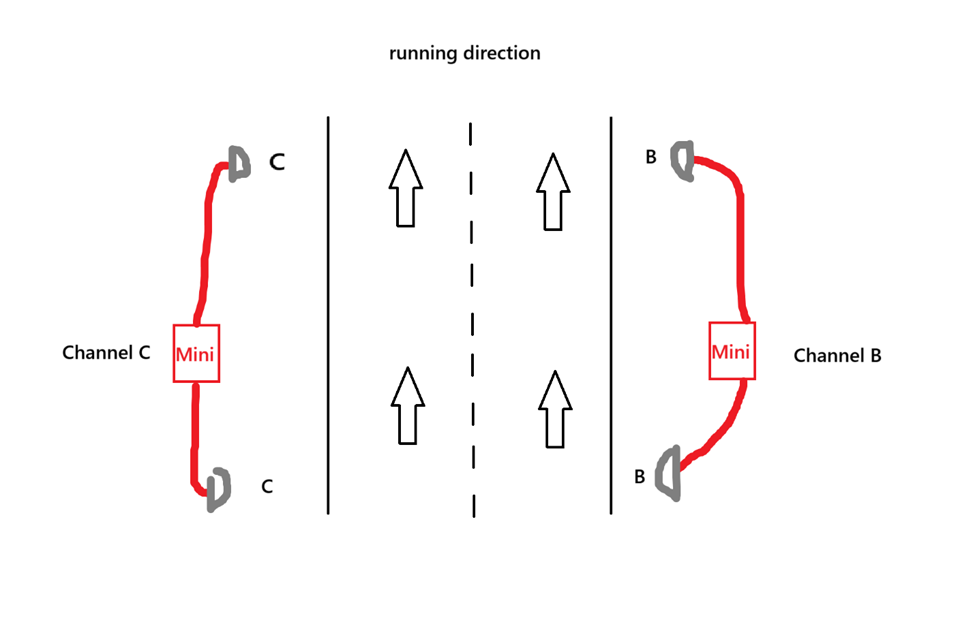
Adjust it to the following pictures.
- Adjust every channel the following schematics.
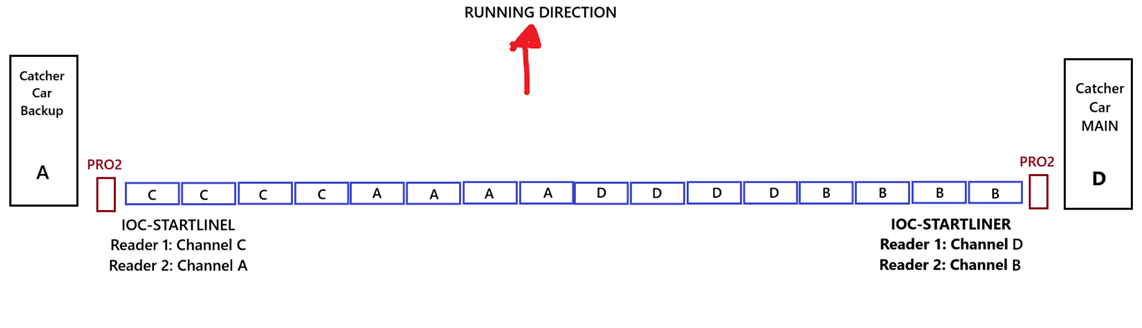
- 15K - Split:
- 40k Split: (GER/AUT)